 Save
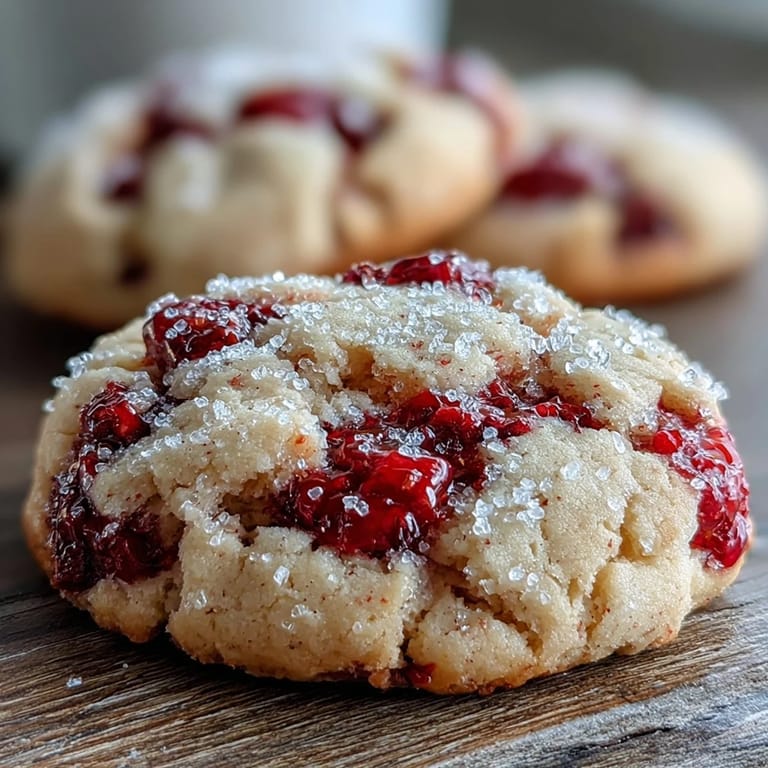
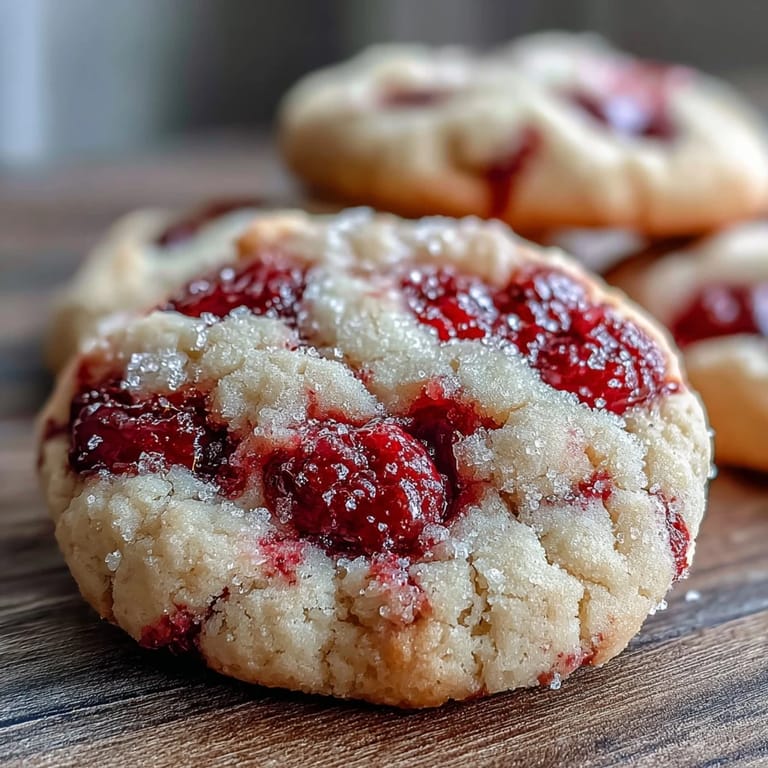
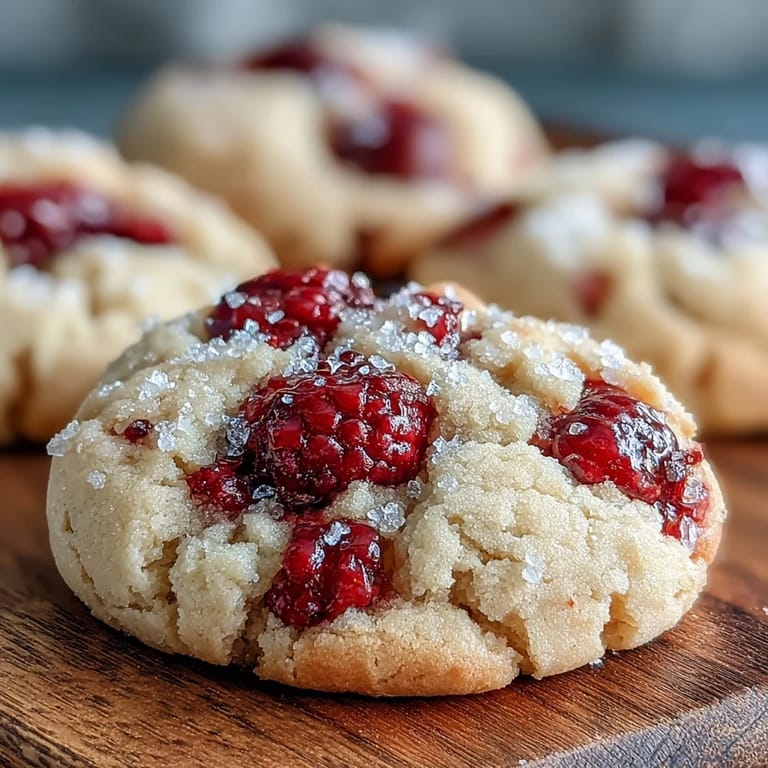
Save I pulled a tray of these from the oven on a Tuesday afternoon when the kitchen was too warm and my daughter was pestering me for a snack. The raspberries had stained the dough in soft pink streaks, and the sugary crust caught the light like something from a bakery window. She took one bite, still warm, and declared them better than any cookie I'd bought. I've made them a dozen times since, and they never last more than two days.
The first time I brought these to a potluck, someone asked if I'd used a secret ingredient. I laughed and told her it was just cornstarch, which keeps the cookies tender instead of crispy. She looked skeptical until she ate three more. Now I make a double batch whenever I know I'm feeding a crowd, because people always come back for seconds.
Ingredients
- Unsalted butter, softened: This is the base of your cookie's texture, so let it sit out until it's truly soft—not melted, not cold—so it whips up light and fluffy.
- Granulated sugar and light brown sugar: The mix gives you both sweetness and chew, and the brown sugar adds a hint of caramel that pairs beautifully with berries.
- Eggs, room temperature: Cold eggs don't blend as smoothly, so I set mine on the counter while I gather everything else.
- Vanilla extract: Just enough to round out the sweetness without overpowering the raspberry flavor.
- All-purpose flour: The structure of the cookie, measured carefully so they don't turn out dry or dense.
- Cornstarch: This is what makes them impossibly tender—it interrupts the gluten just enough to keep things soft.
- Baking powder and baking soda: Together they give a gentle lift and help the edges set while the centers stay chewy.
- Salt: Balances all that sugar and makes the raspberry flavor pop.
- Fresh raspberries: Gently washed and patted dry so they don't bleed too much into the dough, though a little pink swirl is part of the charm.
- Granulated sugar for coating: Creates that sparkly, slightly crunchy crust that makes these cookies irresistible.
- Crushed freeze-dried raspberries: Optional, but they add a punch of color and concentrated berry flavor to the coating without any extra moisture.
Tired of Takeout? 🥡
Get 10 meals you can make faster than delivery arrives. Seriously.
One email. No spam. Unsubscribe anytime.
Instructions
- Prep your oven and pans:
- Set your oven to 350°F and line two baking sheets with parchment. This keeps the bottoms from browning too fast and makes cleanup a breeze.
- Whisk the dry ingredients:
- Combine flour, cornstarch, baking powder, baking soda, and salt in a medium bowl. Whisk it well so everything is evenly distributed and your cookies bake uniformly.
- Cream the butter and sugars:
- Beat softened butter with both sugars on medium speed for 3 to 4 minutes until it's pale and fluffy. This step adds air and sets up that soft, pillowy texture.
- Add the eggs:
- Drop them in one at a time on low speed, mixing just until each one disappears into the batter. Scrape down the sides so nothing gets left behind.
- Mix in the vanilla:
- Stir it in until it's fully blended and the kitchen smells like a vanilla dream.
- Fold in the dry ingredients:
- Add the flour mixture gradually on low speed and stop as soon as you don't see any streaks. Overmixing makes cookies tough, and nobody wants that.
- Fold in the raspberries:
- Use a spatula to gently fold in the fresh berries by hand. Some will break and stain the dough pink, which is exactly what you want.
- Prepare the coating:
- Stir together the sugar and crushed freeze-dried raspberries in a small bowl. The color is gorgeous and the flavor is bright.
- Shape and coat the dough:
- Scoop out portions with a cookie scoop, roll them into smooth balls, then roll each one in the raspberry sugar until they're fully coated and sparkly.
- Arrange on baking sheets:
- Space the dough balls about 2 inches apart so they have room to spread without merging into one giant cookie.
- Bake until just set:
- Slide them into the oven for 10 to 12 minutes. The edges should look set and the centers still a little soft and underbaked.
- Rest and cool:
- Let them sit on the hot pan for 5 minutes to finish setting, then move them to a wire rack. They'll firm up as they cool but stay wonderfully chewy inside.
 Save
Save One summer evening, I made these with raspberries we'd picked that morning, still warm from the sun. My son ate four cookies standing at the counter, juice staining his fingers, and told me they tasted like the best part of summer. I realized then that recipes like this aren't just about sugar and butter—they're about catching a moment and holding onto it for a little while longer.
How to Store and Enjoy Later
I keep these in an airtight container on the counter, and they stay soft and chewy for up to four days. If I'm planning ahead, I freeze the baked cookies in a zip-top bag for up to three months, and they thaw beautifully in about an hour. You can also freeze the dough balls before baking, then bake them straight from frozen—just add a minute or two to the baking time.
Getting the Best Texture
The secret to that pillowy chew is not overbaking. The centers should look slightly underdone when you pull them out, because they'll continue to set on the hot pan. I learned this the hard way after a batch came out too firm, and now I always err on the side of underbaking. If you like a thicker cookie, refrigerate the dough for 30 minutes before scooping—it slows the spread and gives you a puffier result.
Making Them Your Own
These cookies are endlessly adaptable. I've swirled a teaspoon of raspberry jam into each dough ball before rolling it in sugar, which gives you a surprise pocket of sweetness in the center. You can also swap the raspberries for blueberries or blackberries, or use a mix of freeze-dried strawberries in the coating for a different flavor. The base dough is forgiving, so don't be afraid to experiment.
- Try adding a teaspoon of lemon zest to the dough for a bright, citrusy note.
- Use half whole wheat flour for a nuttier, heartier texture.
- Roll the dough balls in coarse sugar instead of granulated for an extra crunchy crust.
 Save
Save These cookies have become my go-to when I want something that feels special but doesn't require all day in the kitchen. They're proof that a little fruit and a lot of butter can turn an ordinary afternoon into something worth remembering.
Recipe Questions & Answers
- → Why chill the dough before baking?
Chilling the dough for 30 minutes helps cookies maintain their shape during baking and enhances the overall flavor development. The cold dough prevents excessive spreading, ensuring thicker, chewier results.
- → Can I use frozen raspberries instead of fresh?
Fresh raspberries work best as frozen ones release excess moisture that can make the dough soggy. If needed, substitute with ¾ cup crushed freeze-dried raspberries mixed directly into the dough for intense flavor without extra liquid.
- → How do I know when the cookies are done?
The cookies are ready when edges appear set but centers still look slightly underbaked. This typically takes 10-12 minutes at 350°F. They'll continue firming up on the baking sheet during the 5-minute rest period.
- → What's the purpose of cornstarch in this dough?
Cornstarch creates a softer, more tender texture by inhibiting gluten formation. It contributes to the characteristic pillowy, chewy consistency that makes these cookies so delightful.
- → How should I store these raspberry cookies?
Keep cookies in an airtight container at room temperature for up to 4 days. For longer storage, freeze for up to 3 months. Place parchment paper between layers to prevent sticking.
- → Can I make these dairy-free?
Substitute the butter with a high-quality plant-based butter alternative. Ensure your chosen replacement performs similarly to butter in baking, as the fat content affects texture and spread.