 Save
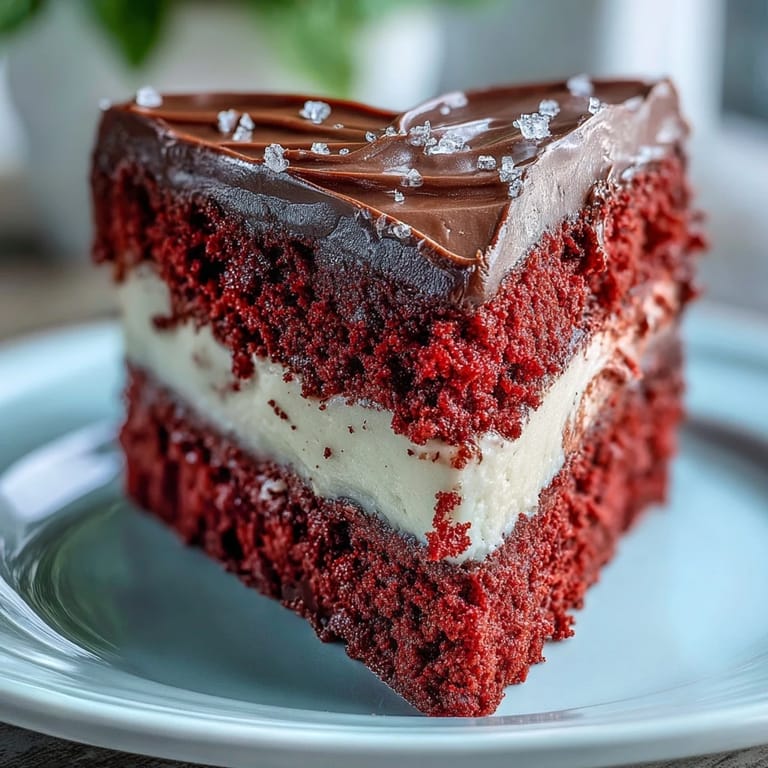
Save The first slice always goes to the birthday girl, but when I pulled this cake from the oven last February, my daughter gasped before I even frosted it. The red was so vivid it looked like velvet under the kitchen lights. I'd been planning her Betty Boop party for weeks, and this heart-shaped centerpiece was supposed to be the surprise. She peeked around the corner just as I was leveling the layers, and her eyes went wide.
I made this cake again for my niece's bridal shower, swapping the Betty Boop silhouette for a simple B monogram in white chocolate. Everyone assumed I'd ordered it from a bakery. One guest even asked for the name of the shop. When I admitted I baked it in my own kitchen the night before, she didn't believe me until I showed her a photo of my messy counter covered in powdered sugar and parchment scraps.
Ingredients
- Cake flour: This finer grind gives you that tender, delicate crumb that makes red velvet actually melt on your tongue instead of sitting heavy.
- Natural unsweetened cocoa powder: Just enough to add depth without making it taste like chocolate cake, it's the secret backbone of the flavor.
- Baking powder and baking soda: The combo gives you both lift and that slight tang, and the vinegar reaction with baking soda is what creates those airy pockets.
- Unsalted butter: Room temperature is non-negotiable, cold butter won't cream properly and you'll end up with dense spots.
- Granulated sugar: Creaming it with butter incorporates air, which is half the battle for a light cake.
- Eggs: Also room temperature so they blend smoothly without deflating your batter.
- Buttermilk: The acidity tenderizes the gluten and adds that classic tangy undertone.
- Red gel food coloring: Liquid dyes water down your batter, gel keeps the color intense without messing up the texture.
- Pure vanilla extract: Rounds out all the flavors and makes everything smell like a hug.
- White vinegar: Activates the baking soda for that signature fluffy crumb and a subtle tang.
- Cream cheese: Must be softened or it'll clump in the frosting, no one wants cream cheese pebbles.
- Powdered sugar: Sifting it prevents gritty frosting and makes spreading a breeze.
- Dark chocolate or candy melts: Candy melts are easier for beginners because they set firm without tempering.
- Parchment paper: Your best friend for releasing that chocolate silhouette without cracking it.
Tired of Takeout? 🥡
Get 10 meals you can make faster than delivery arrives. Seriously.
One email. No spam. Unsubscribe anytime.
Instructions
- Prep Your Pans:
- Preheat your oven to 350°F and grease those heart pans generously, then line the bottoms with parchment. This double insurance means your cakes will pop out clean every single time.
- Mix the Dry Ingredients:
- Whisk together the cake flour, cocoa, baking powder, baking soda, and salt in a medium bowl. Set it aside and resist the urge to skip the whisking, clumps will haunt you later.
- Cream Butter and Sugar:
- Beat the butter for a full minute until it's creamy, then add sugar gradually and keep beating for 2 to 3 minutes. You want it pale and fluffy, that's where the lightness starts.
- Add Eggs One at a Time:
- Crack each egg into the bowl on low speed, letting it blend before adding the next. Scrape down the sides between additions so nothing hides in the corners.
- Color and Flavor the Batter:
- Stir in the red gel, vanilla, and vinegar until the batter is a uniform, bold red. Don't be shy with the gel, you want that wow factor.
- Alternate Wet and Dry:
- On low speed, add one-third of the dry ingredients, then half the buttermilk, mixing just until combined. Repeat and finish with the last third of dry ingredients, stopping as soon as you don't see streaks.
- Activate the Baking Soda:
- In a small cup, mix 1 teaspoon vinegar with the baking soda, watch it foam, then gently fold it into the batter. That fizz is what gives you those airy pockets.
- Bake the Cakes:
- Divide the batter evenly between your pans, smooth the tops, and bake for 25 to 30 minutes. A toothpick should come out clean, but don't overbake or the edges will dry out.
- Cool Completely:
- Let the cakes rest in the pans for 10 minutes, then run a knife around the edges and flip onto wire racks. Peel off the parchment and let them cool fully before you even think about frosting.
- Make the Frosting:
- Beat the cream cheese and butter together for 2 minutes until smooth, then gradually add the powdered sugar, salt, and vanilla. Keep it covered in the fridge if you're not using it right away.
- Assemble and Crumb Coat:
- Level the domes if needed, place one layer on your board, pipe or spread about three-quarters cup of frosting on top, then add the second layer. Chill for 15 minutes, then apply a thin crumb coat and chill again for 10 minutes.
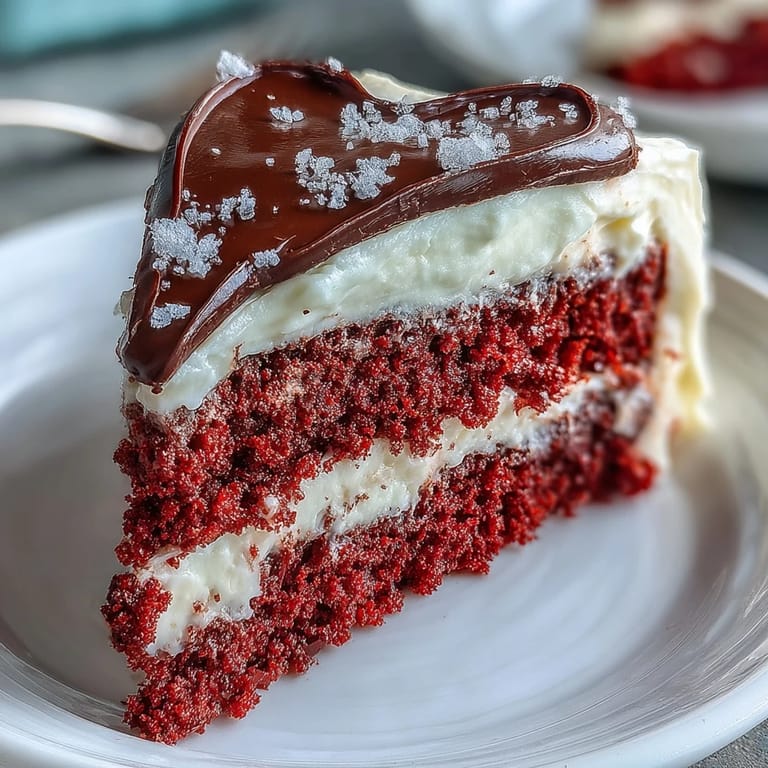
- Final Frosting:
- Spread a smooth final layer of frosting over the entire cake, using an offset spatula to create swirls or keep it sleek. Take your time, this is the part everyone sees.
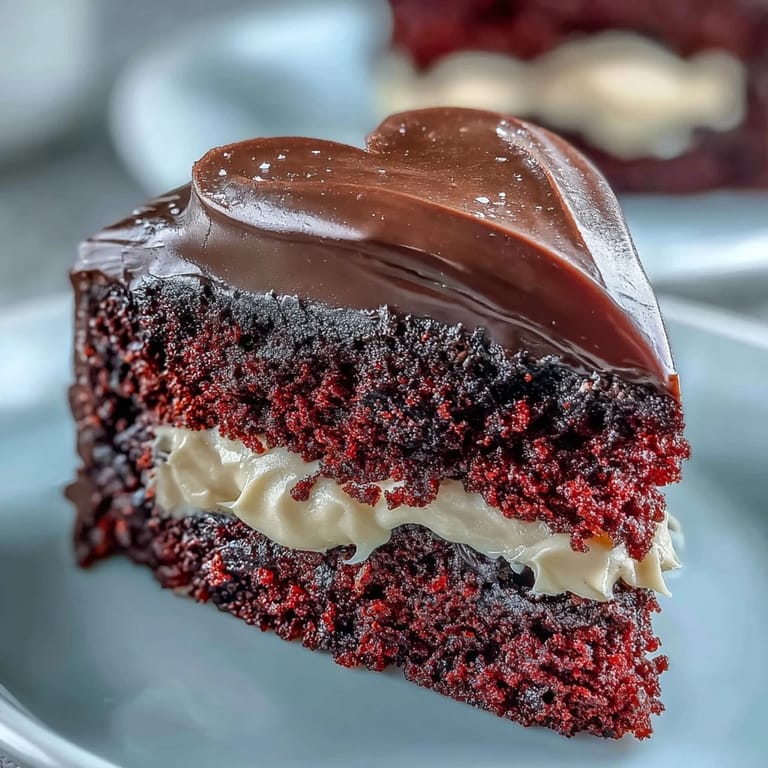
- Create the Chocolate Silhouette:
- Place your stencil under parchment and pipe or brush melted chocolate over the outline. Let it set completely at room temperature or speed it up in the fridge for 10 minutes.
- Apply the Silhouette:
- Peel the chocolate carefully from the parchment and lift it onto the center of your cake. Press gently so it sticks to the frosting without cracking.
- Decorate and Chill:
- Add any extra touches like rosettes, edible glitter, or sugar pearls around the edges. Chill the whole cake for 30 minutes before slicing with a warm, clean knife.
 Save
Save The best part of this cake isn't just how it tastes, it's watching someone's face when they realize the chocolate silhouette is edible. At my daughter's party, kids kept asking if they could eat Betty's face, and I loved saying yes. It became a game of who could get the biggest piece of chocolate with their slice. One little boy saved his chocolate piece for last, treating it like treasure.
Choosing Your Chocolate
Dark chocolate gives you a sophisticated bittersweet contrast that balances the sugary frosting, but candy melts are way more forgiving if you're new to this. I've used both, and honestly, candy melts set faster and don't require tempering, which means less stress and fewer cracked silhouettes. If you want a starker contrast, try white chocolate dyed black with oil-based coloring, it looks striking against the red.
Frosting Tricks That Work
Heating your offset spatula under hot water, then wiping it dry before smoothing frosting, is a trick I picked up from a YouTube video at midnight. It works like magic, giving you that glossy, professional finish without fighting with stubborn buttercream. If your frosting feels too stiff, add a teaspoon of milk at a time until it's spreadable. If it's too loose, pop it in the fridge for 10 minutes and try again.
Storage and Serving
This cake keeps beautifully in the fridge for up to four days, covered loosely so the frosting doesn't stick to the wrap. Let it sit at room temperature for about 20 minutes before serving so the frosting softens and the flavors wake up. If you're making it ahead, bake the layers a day early, wrap them in plastic, and frost the day of your event.
- Slice with a warm knife, wiping it clean between cuts for picture-perfect slices.
- Leftover slices freeze well wrapped individually in plastic and foil for up to a month.
- If you don't have heart-shaped pans, two round 9-inch pans work just fine, the silhouette will still steal the show.
 Save
Save Every time I make this cake, someone asks for the recipe, and I love that it's become my signature. There's something about handing someone a slice with that crisp chocolate heart on top that feels like giving a little piece of joy.
Recipe Questions & Answers
- → What makes the red color so vibrant?
Gel-based food coloring provides the most intense red hue without thinning the batter or affecting the texture. Liquid coloring can alter consistency, so gel is preferred for professional results.
- → Can I make the chocolate silhouette ahead of time?
Yes, prepare the dark chocolate silhouette up to a week in advance. Store between parchment paper in an airtight container at room temperature, then place on the finished cake when ready to serve.
- → Why use both white vinegar and baking soda?
The combination creates a chemical reaction that produces carbon dioxide bubbles, resulting in a lighter, more tender crumb. This traditional red velvet technique enhances texture without altering flavor.
- → How should I store leftovers?
Keep covered in the refrigerator for up to 4 days. The cream cheese frosting requires cool storage to maintain stability. Bring to room temperature 20 minutes before serving for optimal texture and flavor.
- → Can I use regular cake flour instead of sifted?
Sifting is essential for aerating the flour and preventing lumps. Even pre-sifted flour should be sifted again when measuring to ensure accurate volume and a smooth, even batter.
- → What's the best way to get clean slices?
Use a warm, clean knife dipped in hot water and wiped dry between cuts. This prevents the frosting from dragging and creates neat, professional-looking slices through all layers.